This is an old revision of the document!
Table of Contents
Finding aids
Encoding finding aids
Workflow
There are three folders on the “R” drive for finding aids.
- EAD/mss_ead/completed_ead is the canonical source for all of our completed finding aids,
- EAD/mss_ead/in_process_ead is a working directory.
- The /findingaids folder, on the top level of R, is the location of our finding aids that are displayed on the web.
Writing and Editing the EAD record
Any new finding aids being authored, or edits to existing ones, should happen in the /in_process_ead folder. To edit, drag the file out of /completed_ead, edit, test, and return the final file to /completed_ead. Once you are confident the file is ready for public display, move it to the /findingaids folder.
If you are updating an existing finding aid in the /findingaids folder, make sure you delete the accompanying PDF file if one exists. A new one will be generated on demand based on your updated file.
![]() Please don't edit files in the /findingaids or /completed_ead folders and make sure any file added to /findingaids has been checked in oXygen.
Please don't edit files in the /findingaids or /completed_ead folders and make sure any file added to /findingaids has been checked in oXygen.
Editing the Wordpress/UMarmot page
Navigate to, or create, the Wordpress post and add a Page Title and a collection description/bioghist at the top of the page. Then under the Custom Field Template add, at a minimum, info to the following fields:
- unitid: (i.e. MS 1079)
- eadid: (i.e. mums1079)
- findingaid (add Yes to Is there a finding aid? field)
- credocontent
- unittitle
- unitdate
- bulkdates
- boxes
- linearfeet
- acqinfo
- subjects
- genreform
In the Post sidebar on the right, make sure to include the following:
- Change Status & Visibility to Public
- Check off all the appropriate Categories
- Add Tags for mss and the first letter of the collection
- Set a Featured image (if appropriate)
Notes and tips
When encoding a finding aid that references some (any) digital content in Credo, remember to include an <altformavail type=”digital”> element in the EAD and in the UMarmot record (see examples of wording online).
Secondly, in the UMarmot record itself, there is a field label credocontent in which you enter the word “Yes,” if more or less the entire collection is digitized, or “Selected,” if only some of the collection is digitized. Capitalization matters. [notes from Rob]
Adding a image to a finding aid (not UMarmot)
<dao href=“http://scua.library.umass.edu/images/findingaids/pictureyouwanttouse.jpg” altrender=“right”><daodesc><p>Description of picture</p></daodesc></dao>
You can drop that in the approximate location you want it to appear. Usually at the top of the background note: see: http://findingaids.library.umass.edu/ead/mums312
Send Aaron the photo you want to use and he can put it in the appropriate place to link to. At this point he is the only person who can add the images.
Transforming a spreadsheet inventory to EAD using Oxygen
This is process to transform an Excel or Google spreadsheet into a c02 file level EAD inventory. It was adapted from this post from an archivist at the Tamiment.
If you have subseries or something more complicated, you may need to tweak the XSLT or transform it in sections. If you do tweak the XSLT, make a copy of the xml2EAD.xsl file, which is located in /spec_collections/EAD/xml2EAD.xsl.
Before you start
You will need to cleanup all the data in your spreadsheet. It's best to do that in Excel/Google first.
- Make sure dates and folder numbers are correct, spelling errors are fixed, etc. You can have as many columns as you want, but whatever columns you want in your inventory will need to be mapped to an EAD element.
- Title you columns exactly how the element appears in EAD (e.g. unittitle, unitdatenormal, unitdate, etc.)
- For approximate dates, you will need to insert one column titled approximate and then type the word approximate for any date that is approximate.
- Before you ingest it into Oxygen, you will have the option to not include certain columns, so you don't need to delete columns like “notes”, “digitized”, “file name”, etc. if you want to keep the spreadsheet for more detailed information.
- To include the normal=“XXXX/XXXX” date attribute, you will need to create an additional date column with the dates formatted that way (e.g. YYYY-MM-DD/YYYY-MM-DD, YYYY/YYYY, etc.)
- Delete any blank columns and rows or it will introduce several blank elements.
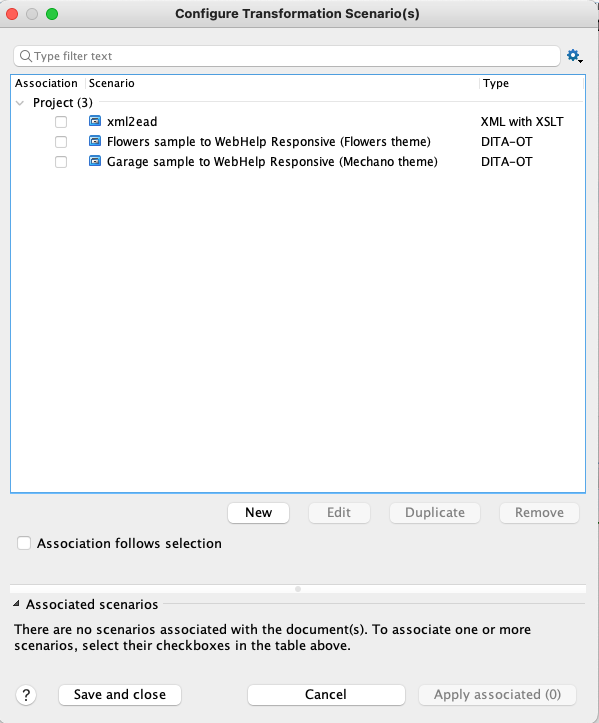
Open Oxygen and set up the “XSLT Transformation Scenario”
- Click on the Configure Transformation Scenario icon. (The wrench with a red play button).
- Click New→XSLT transformation.
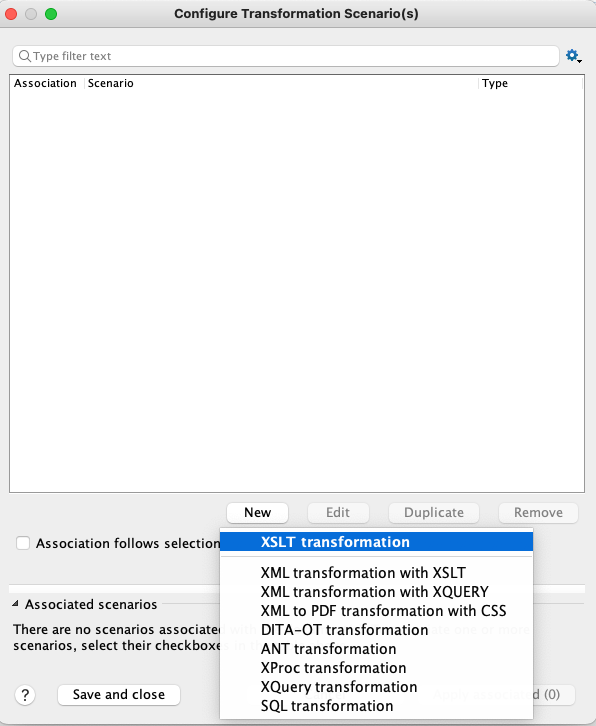
- In the New scenario dialog box, do the following:
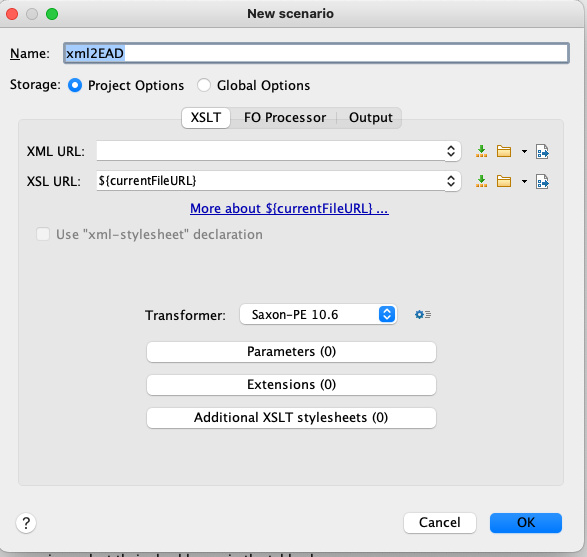
- Name the file. You can name it whatever you want. xml2EAD is fine.
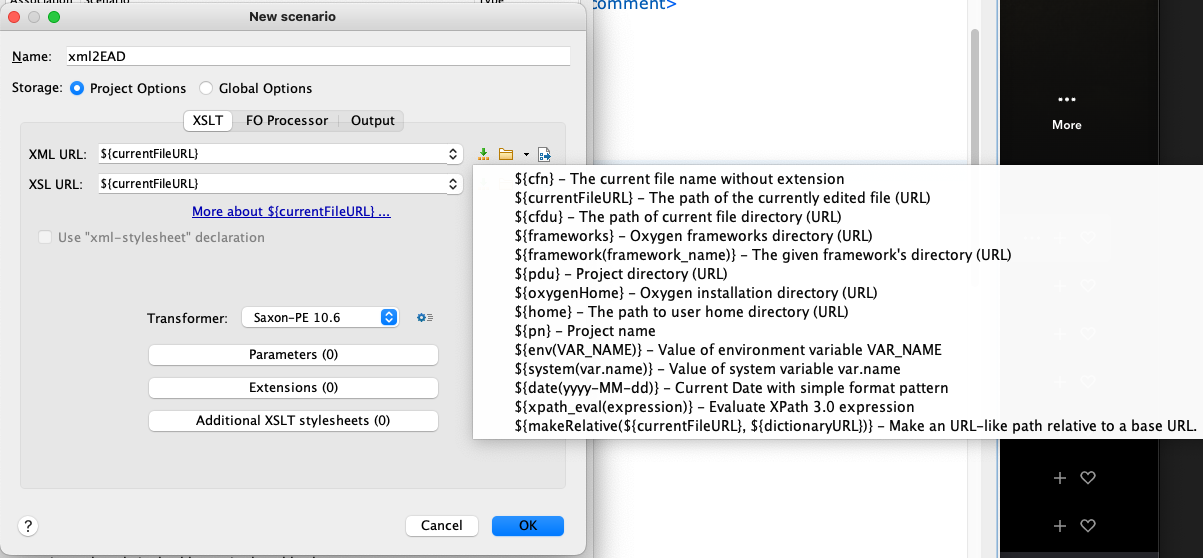
- For XML URL choose ${currentFileURL} by clicking on the green down arrow.
- For XSL URL click on the folder icon and navigate to the EAD folder in spec_collections/EAD and choose xml2EAD.xsl.
- Choose Saxon-PE 10.6 as the Transformer. Save. This should now appear in the list of options when you clock on the red transform button
Transform the Sheet
- Save your Excel spreadsheet or download your Google Spreadsheet as an .xslx
- Open Oxygen and select File→Import/Convert MS Excel File to XML. Navigate to your file. Click Next.
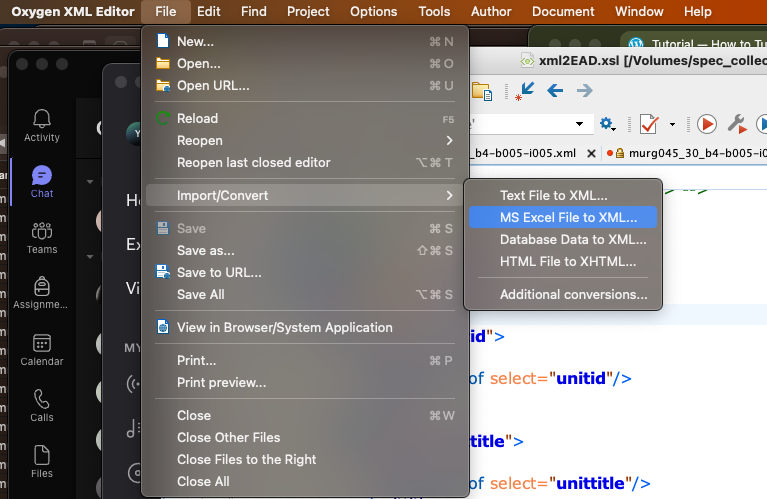
- Make sure “First row contains field names” is selected then click on the any column headers twice that you want to exclude.
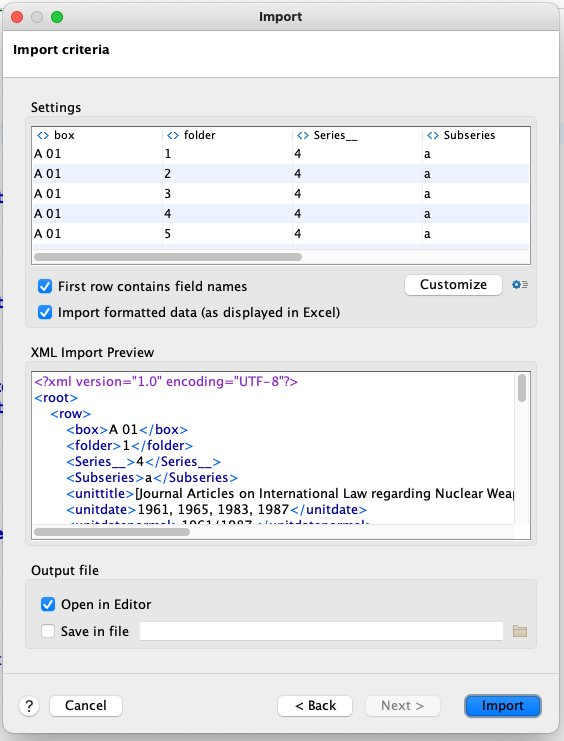
- Click Import.
- Then click the red transformation arrow and choose the xml2ead scenario that you added earlier. Then select Apply associated.
- Voila! Now you can copy paste into your Finding Aid!
